Introduction:
In previous article, “How to find the file when I forgot the file name”, it already mentioned on the Windows OS “Explorer” and on Mac OSX “Finder” to find file. Both applications only work on online disk. The application aSearchy allows offline indexing. This article introduces the method to configure on navigating and searching a file in any offline drive conveniently.
Terminology:
Disk or drive has same meant in some aspect. Hard disk is same as hard drive. The removeable drive which refers to removable flash drive is not a “disk”. The removable disk which refers to removable hard disk is can also called removable drive. For consistence, this article uses “drive”.
Offline in this article meant disconnected for network; detached or unplug for any removable drive; unmounted for CD, DVD, Blue ray media.
Online in this article meant network connected; removable drive plugged or attached; CD, DVD Blue ray disk mounted.
Advantages:
Offline search has following advantages:
- Evaluation before plug in or connect any physical drives
- Navigate and search file without attached the physical drive one by one
- Convenient and time saving for finding the suitable drive at once
- Check duplication of files on different drives
- Maintain and keep track of files stored across multiple drives
- Store secure files in removable drive and unplug it, easy to monitor the location of files
Note:
The current application only supports one offline drive.
Procedures:
Index the removable drive is easy:
- Change the “Base location” in the configuration dialog
- Create the index, cannot remove the drive during this step
- Navigate or search on the indexed files, it is safe to remove the drive
The following screen captures illustration on those steps.
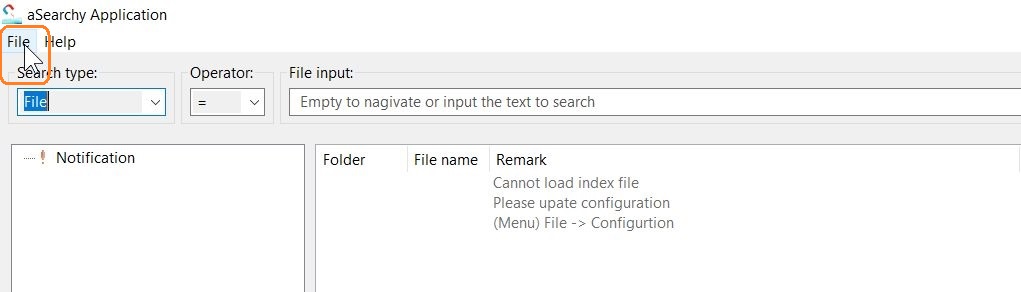
Figure 1. Click “File” in the top left corner, then select “Configure” or press “Ctrl + F2” to directly access the configuration dialog box.
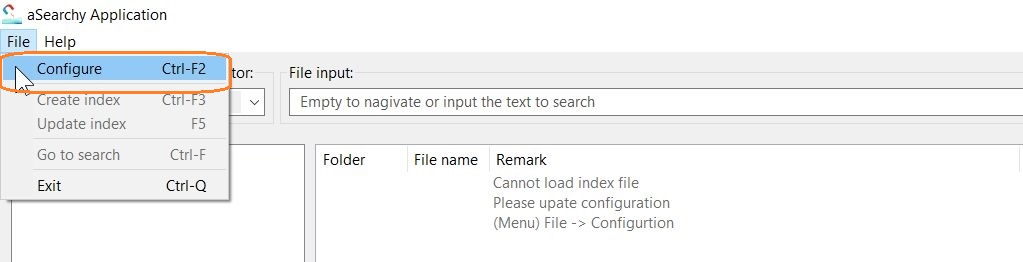
Figure 2. The sub-menu item “Configure” should appear (there is a typo on the remark. It should be “Configure” not “Configuration”). This will pop up the configuration dialog.
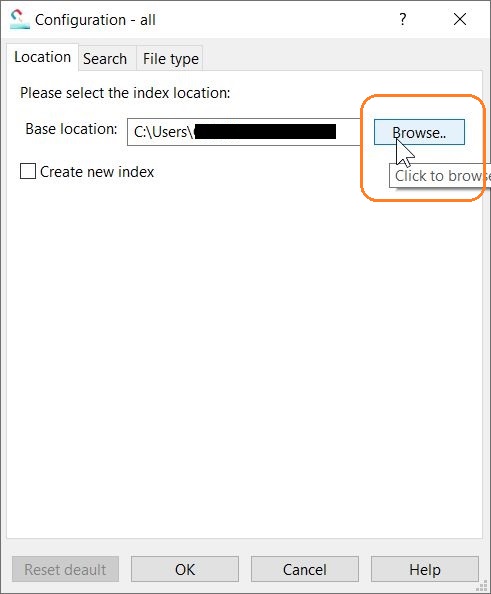
Figure 3. Click “Browse” to change the Base location. Browse to the removable drive.
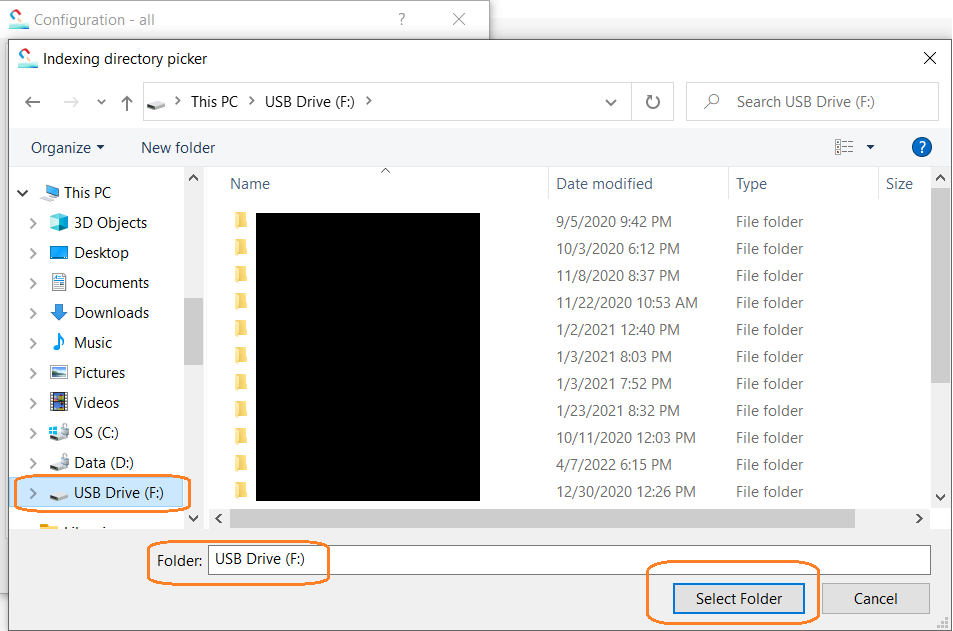
Figure 4. In this example, USB drive (F:\) is selected. Click “Select Folder” to update the base location.
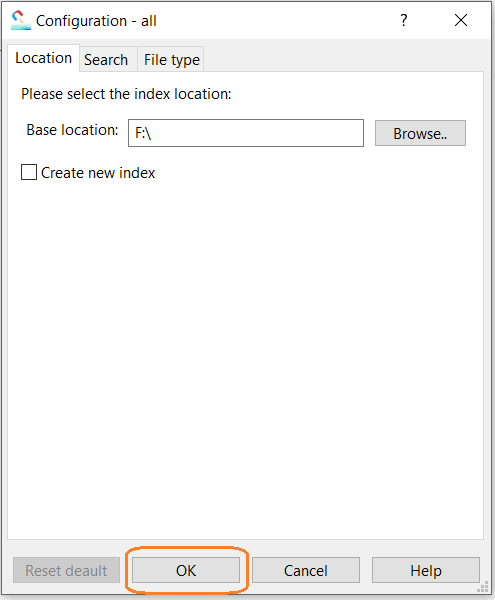
Figure 5. Using “Data drive (F:\)” as an example of base location, all files in this drive will be indexed. Click OK to proceed.
Warning:
The whole drive of F:\ will be indexed by the default file extension. Cannot remove the drive during indexing.
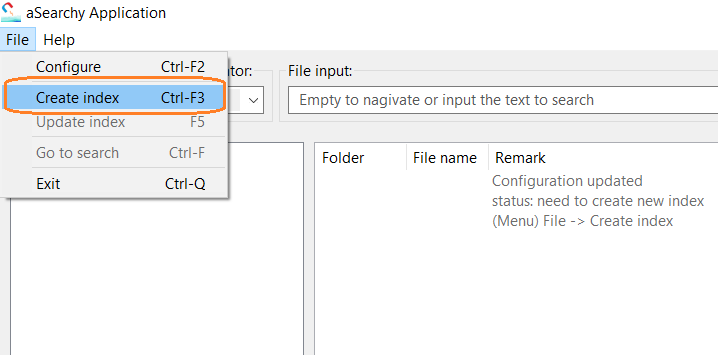
Figure 6. Click “File” then click “Create index” or press “Ctrl + F3” to start to create the index.
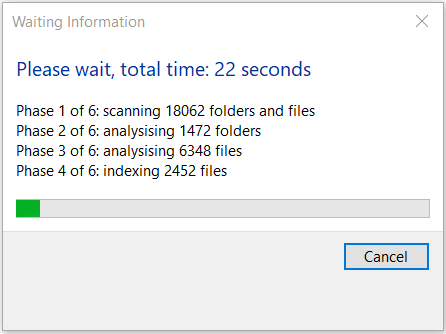
Figure 7. Waiting information: analyzing, and indexing.
Warning:
Cannot remove the drive during indexing.
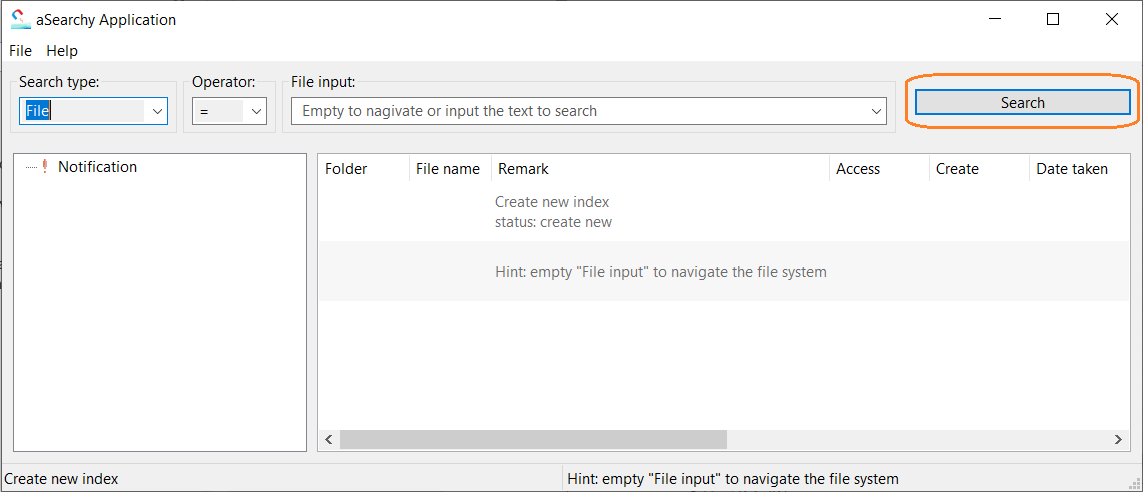
Figure 8. Click the “Search” button to navigate the indexed file. Without any input, the default mode is navigation.
Note:
After the index created, it is safe to remove the removable drive.
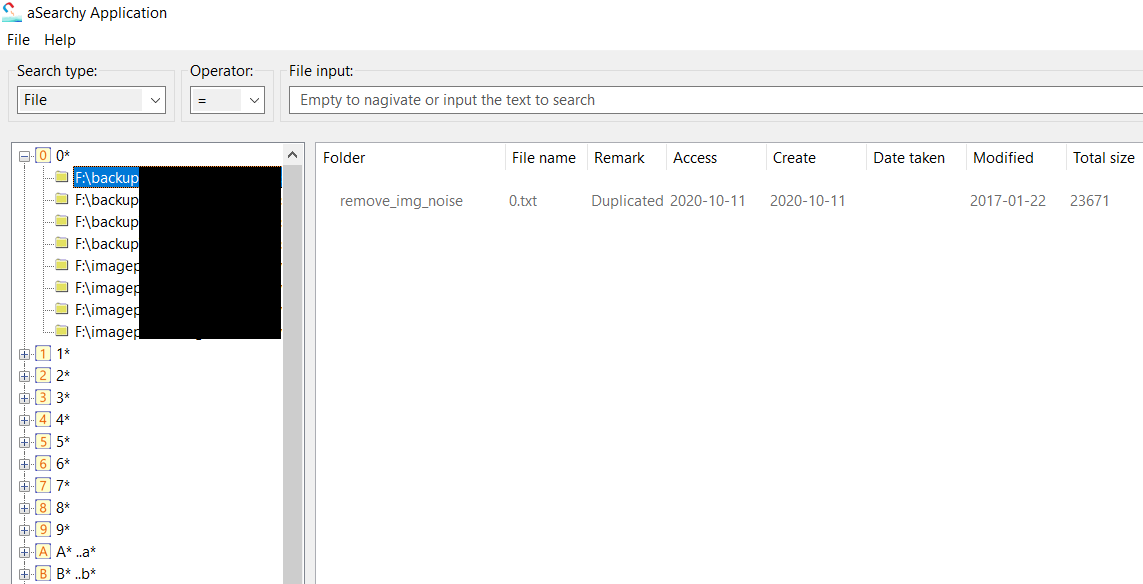
Figure 9. The results should appear instantly. Since there is no file name in the input box, the whole file system of removable drive is automatically displayed.
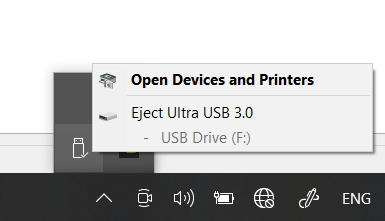
Figure 10. Eject the USB drive safely.
Conclusion:
After indexed any removable drive, it is safe to remove it. These steps of removable drive are same as in normal hard disk. This article also applied for the network drive. All steps are same except eject the drive from PC.
Download: