Introduction:
This is a simple Windows OS user guide for configuring the application. The Mac OSX is basically the same, only the method of launching the application is different. In Microsoft Store, the application is called ‘asearchy’ and in Mac App Store the application is called ‘aSearchy’. For consistency, this document uses ‘aSearchy’. You are welcomed to download the application, links are at the bottom of this guide.
Procedures:
For the simplicity of navigating, exploring, and searching, there are three steps needed to do:
- Configure the “Base location” needed to create the index file
- Create the index file
- Press the button “Search” to navigate the file system
Note:
The guide below provides a brief explanation on configuring the base location, mentioned in step 1 is the most important step.
Terminology:
The “Base location” is where the analyzer and indexer of aSearchy operates. It can be treated as a working path, working folder, or working drive. Without this core location the analyzer and indexer will not work properly.
The text input of the “Base location” depends on the usage. For example, to limit to only the user profile, the path may look like: “C:\Users\[USERNAME]”. The advantage of this input is that narrow down to specific folder and skip a lot of system folders. The indexing speed will be much reduced, the navigation and search response much faster. The disadvantage of this input is that cannot navigate and search out the user profile.
Guided illustration:
The following screen captures explain the three steps mentioned in Procedures.
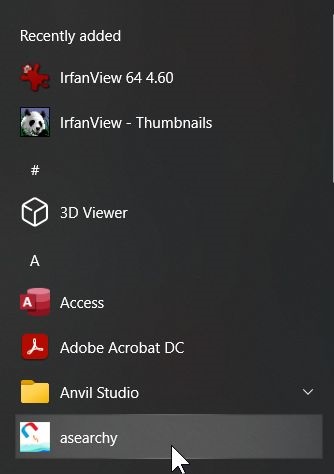
Figure 1. Press the Windows  icon in the desktop bar, and then click “asearchy” in the Windows menu bar.
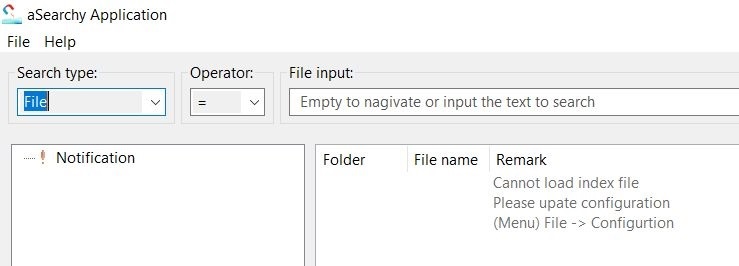
Figure 2. This is the main screen of the application “aSearchy”
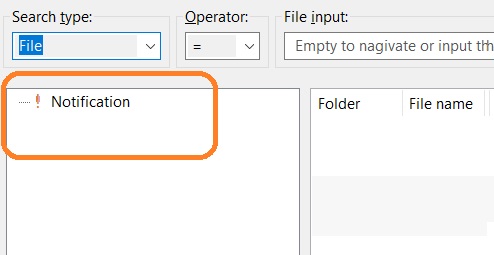
Figure 3. After the application aSearchy appears, a small icon (! Notification) should appear on the left screen.

Figure 4. Users can see a short message on the right panel, under Remark: “Cannot load index file…”. Figure 5 shows how to resolve this.
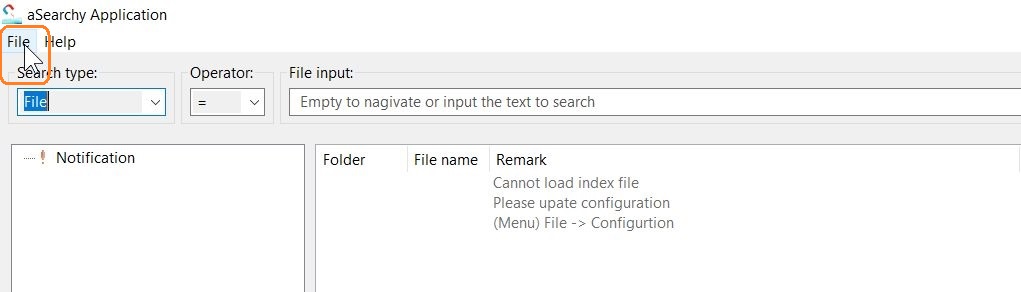
Figure 5. Click “File” in the top left corner, then select “Configure” or press “Ctrl + F2” to directly access the configuration dialog box.
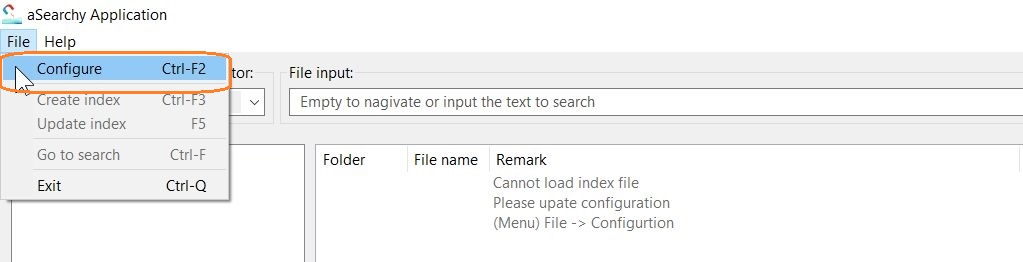
Figure 6. The sub-menu item “Configure” should appear (there is a typo on the remark. It should be “Configure” not “Configuration”). This will pop up the configuration dialog.
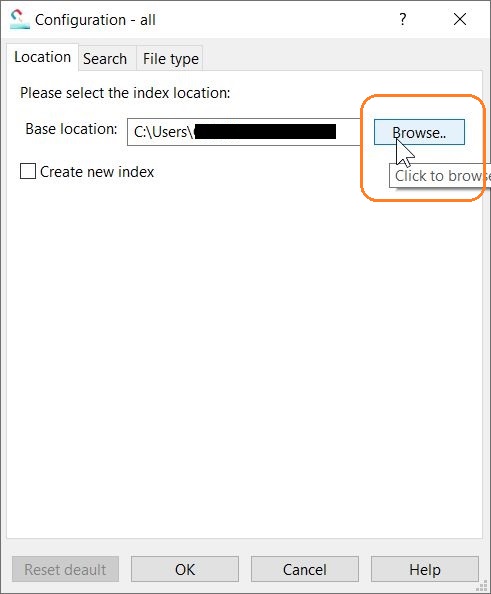
Figure 7. Click “Browse” to change the Base location. This is the most important step in building the index file and function properly. There are tap “Search” and “File type” will be explained in advance user guide.
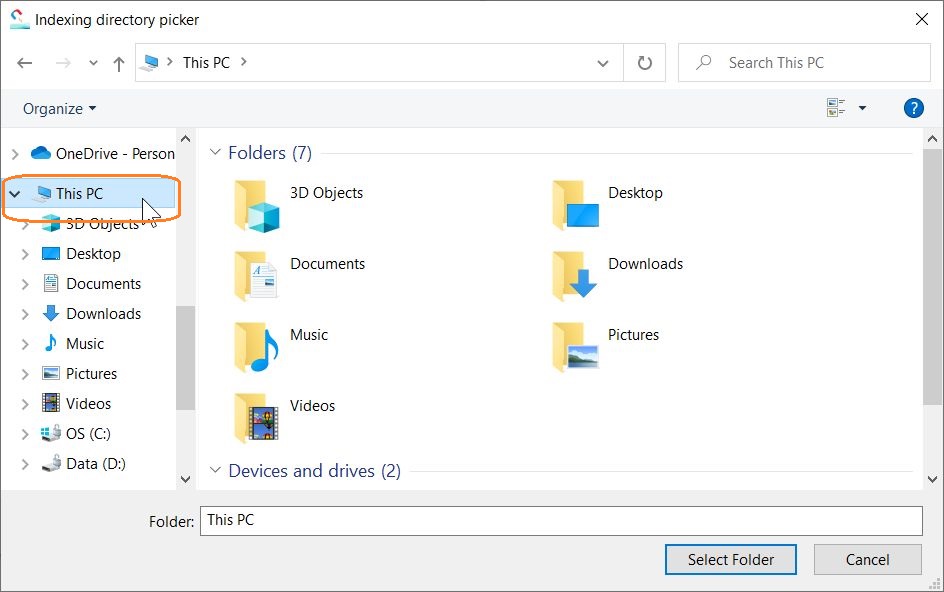
Figure 8. The “Indexing directory picker” pops up and lets the user selects the location (The folder selection is different from other users, select the drive, location that let the application to build index).
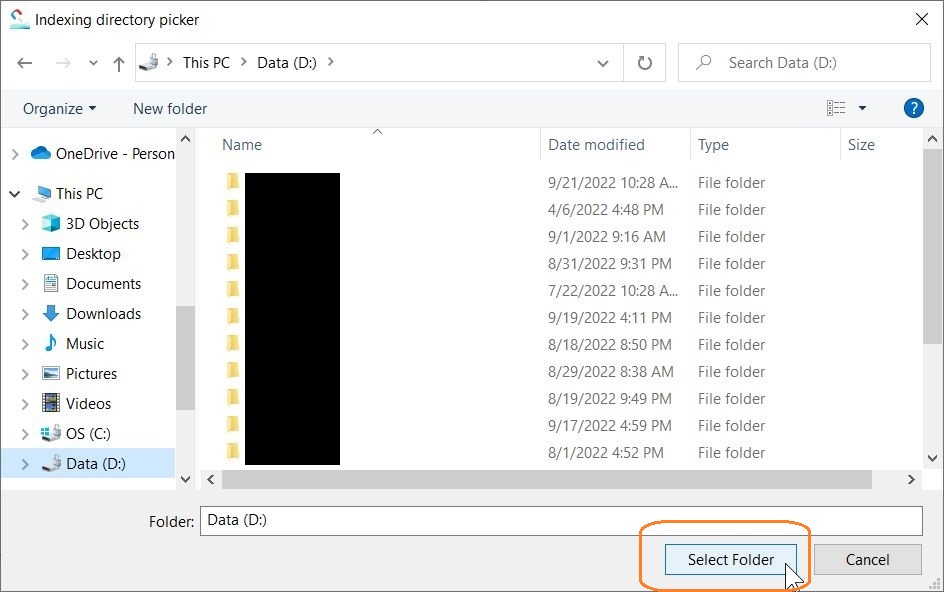
Figure 9. In this example, Data drive (D:\) is selected. Click “Select Folder” to update the base location.
Note:
This marks the end of step one, the most important step in setting up the location for indexing.
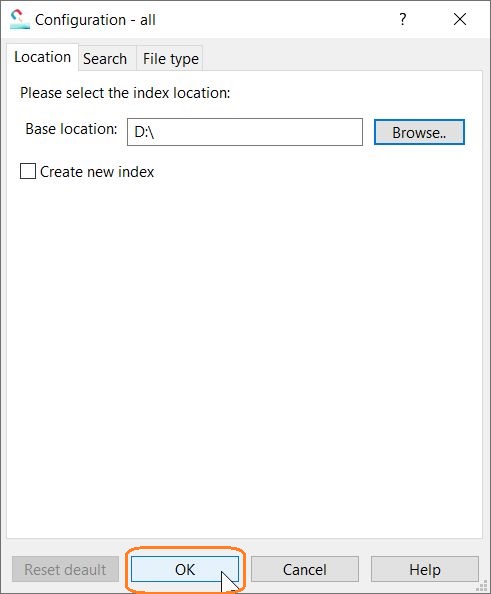
Figure 10. Using “Data drive (D:\)” as an example base location, all files in this drive will be indexed. Click OK to proceed.
Note:
The whole drive of D:\ will be indexed by the default file extension. These file extensions are selectable in the "File type” tap in the configuration dialog box.
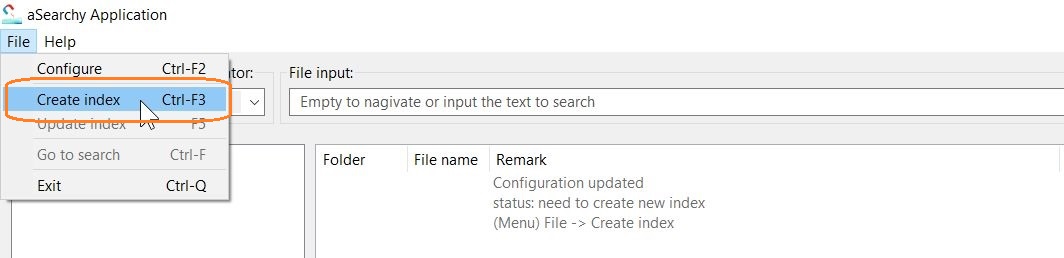
Figure 11. This is the step two. Click “File” then click “Create index” or press “Ctrl + F3”.
Note:
In step 2 the application analyzes the base location after clicking “Create index” or pressing the “Ctrl + F3” directly. If the base location is set as C:\, some system folders will be skipped automatically. The iCloud folder is a special case, if the file is still synchronizing, the application will respond very slowly.

Figure 12. “Please wait, starting …”, this process may take some time (for example, indexing the whole drive D:\ takes more time)
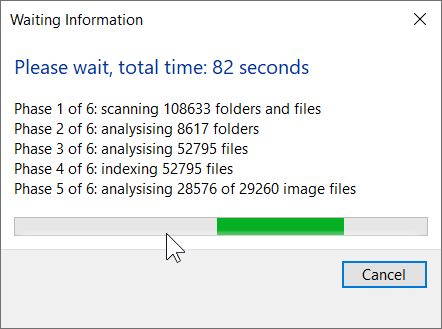
Figure 13. There are a total of six phases, the phase 4 and 5 will take longer than other phases. After all phases are complete, the dialog box will disappear automatically.
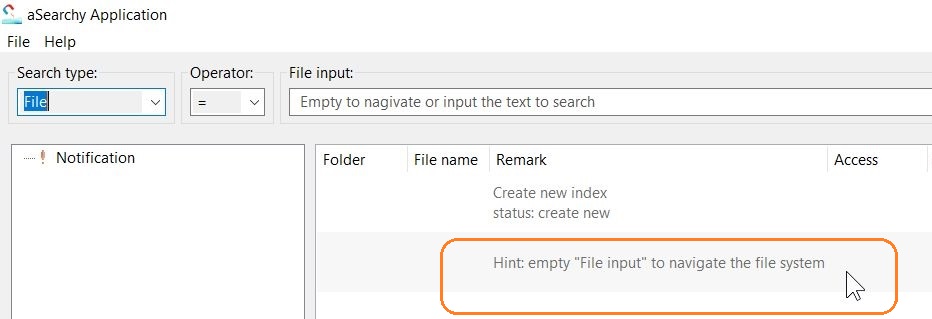
Figure 14. If no errors occur during indexing, the notification “Create new index, status: create new” will be shown under “Remark”. There is also a cue: “Hint: empty “File input” to navigate the file system”.
Note:
This message means if the “File input” search bar is blank, then pressing the “Search” button will navigate the file system. Inputting any text into the “File input” search bar will return any search results.

Figure 15. The default is “File” search type. There are two modes, one is navigating to the file system mode. The other one is searching for input value.
Numbered UI element explain as follow:
- “Search type” drop list allows to select different result shown in the table, default is “File”
- “Operator” drop list allows to select different comparison method; default is “=” (equal sign)
- “File input” text input box allows blank (Empty text) or input any text to search
- “Search” button takes the action on navigation to file system or search for input value
The UI design a bit similar to the Google landing page, as simple as possible. The difference is that the UI contains “Search type” for categories selection, and the operator for limiting the result display. Without the “Search type” and “Operator” UI elements, it is same as Google landing page. These “Search type” selection box and the “Operator” will be mentioned in advanced guide.
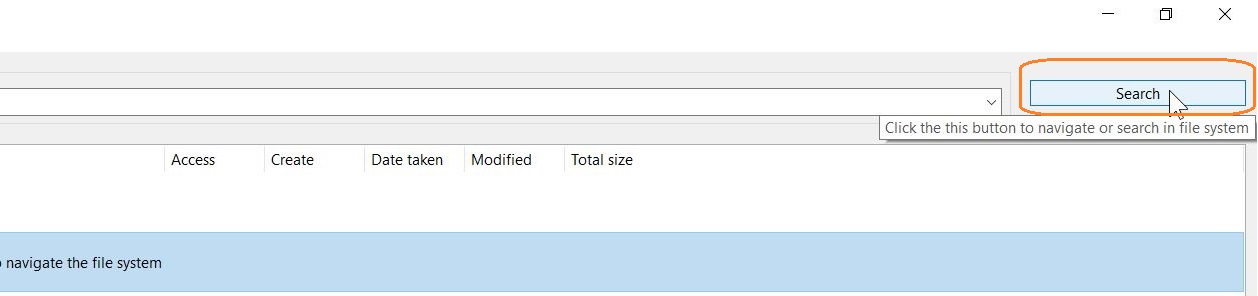
Figure 16. The “Search” button tip displays “Click this button to navigate… “. Without any input, the default mode is navigation. (tip message contains extra “the” will be removed in later update).
Note:
This is the step three. Navigating the file system. By default, the search type is “File”, which shows all the first letters of each file’s name in alphabetic order.
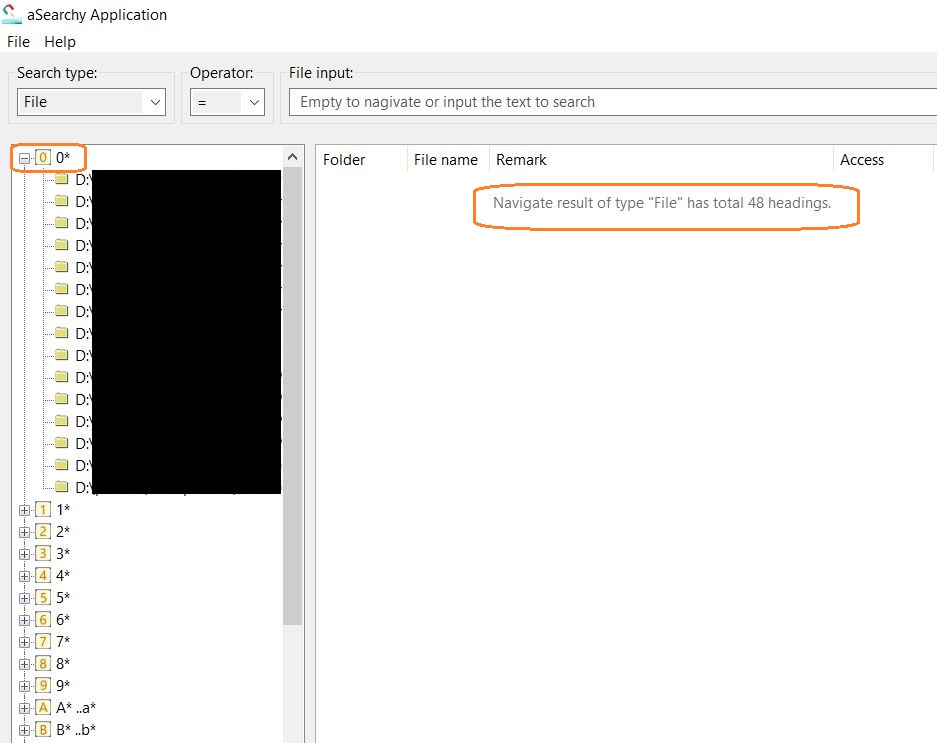
Figure 17. The results should appear instantly. Since there is no file name in the input box, the whole file system is automatically displayed.
Conclusion:
The above three steps show how to configure, create, and navigate the file system. Further features will be explained soon.
Credit:
Thanks for IrfanView, the screen capture is from irfanview application.
Download: